Blog
AI Product Photos for Meta Ads: Step-by-Step Guide
Published July 22, 2026
You're probably staring at a product page, a Meta ad draft, and a studio quote that's too high for a first launch. The photos aren't bad, but they're slow to produce, expensive to reshoot, and hard to test in enough variations to find what drives clicks and sales. That's exactly where ai product photos have become a practical advantage in ecommerce, because the creative bottleneck is often time and scale, not just taste. One 2026 industry roundup says 79% of e-commerce brands now use AI for product-showcase content, and commercial AI APIs can generate product imagery for about $0.02 to $0.20 per image versus roughly $25 to $170 per finished studio image (industry roundup).
Table of Contents
- Introduction to AI Product Photos for Ecommerce
- Preparing Source Images and Planning Photo Angles
- Crafting Prompts and Streamlining Batch Generation
- Post Processing and Quality Assurance
- Integrating A/B Testing into Meta Ads Launch Plans
- Conclusion and Tips for Scaling Your Workflow
Introduction to AI Product Photos for Ecommerce
A lot of new store owners hit the same wall. The first sample arrives, the supplier photos look generic, and the studio route suddenly means booking, shipping, waiting, and paying again if the lighting or angle misses the mark. AI changes that math fast, not by replacing judgment, but by making product imagery cheaper to produce and easier to test across listings and ads (industry roundup).
That cost gap matters because ecommerce creative isn't just about having one polished hero shot. Meta ads need angles that stop the scroll, PDP galleries need images that remove hesitation, and your catalog needs enough variation to avoid looking repetitive. AI product photos give you a way to generate those variants without turning every creative iteration into a new production cycle.
Practical rule: use AI for volume and testing, then keep traditional photography for the items where texture, prestige, or authenticity carry the most weight.
There's also a scale signal here. A separate market report projects the AI product photography market will reach $8.9 billion by 2034, growing at a 15.7% CAGR, which suggests this isn't a novelty tool anymore, it's becoming part of standard retail creative operations (market report). If you're launching ads on a tight budget, the point isn't to chase novelty. It's to turn a single product into enough usable creative to learn what buyers respond to, then scale the winners.
Preparing Source Images and Planning Photo Angles
AI output is only as useful as the source material you give it. A current guide says 2000+ pixels on the long side gives the model enough detail for convincing angles and crops, and that a grey background works better for white or light products because it helps the AI separate the edges more cleanly. It also warns that green screens can create color spill, which is the kind of problem that wrecks realism in the final image (source).
Start by checking whether the original photo is technically usable. The product should be centered, sharply in focus, and lit evenly enough that the AI can see the seams, contours, and boundaries. If you're working with reflective items, pale fabrics, or white packaging, weak contrast in the input almost always shows up later as fuzzy edges, strange shadows, or details that feel pasted on.
Mapping shopper objections to AI photo angles
The smarter move is to plan angles around objections, not aesthetics. Shoppers usually want to know whether something fits, how big it is, what the texture feels like, and whether it's compatible with what they already own. That's why image planning should answer a question, not just look polished.
| Objection | Photo Angle | Purpose |
|---|---|---|
| Fit | On-model or profile view | Shows drape, shape, and how the item sits on a body |
| Size | In-scale lifestyle or hand-held view | Helps the buyer judge relative dimensions |
| Texture | Macro close-up | Reveals weave, finish, stitching, or material detail |
| Compatibility | Side-by-side contextual shot | Shows how the product works with another item or setting |
| Zoom detail | Tight crop of key feature | Reduces uncertainty when shoppers inspect the gallery |
This is the gap most angle guides miss. They list “front, side, close-up,” but don't connect each shot to the exact hesitation it resolves. For a practical ad workflow, that mapping matters more than having a long gallery. If you want a useful creative reference for structuring static ad concepts around buyer intent, this static ads example library is a helpful internal benchmark.
Crafting Prompts and Streamlining Batch Generation
Good prompts are less about clever wording and more about control. The prompt needs to tell the model three things clearly, the style, the shot type, and the context. If you skip one of those, you usually get a pretty image that doesn't fit the brand or the campaign.
For example, a prompt for a smartwatch might ask for a sleek product on a minimalist pedestal, studio lighting, and a clean background. A hiking backpack prompt might instead push for a lifestyle setting, outdoor light, and a visible sense of durability. The difference isn't cosmetic, it decides whether the image belongs in a premium landing page or a performance ad.
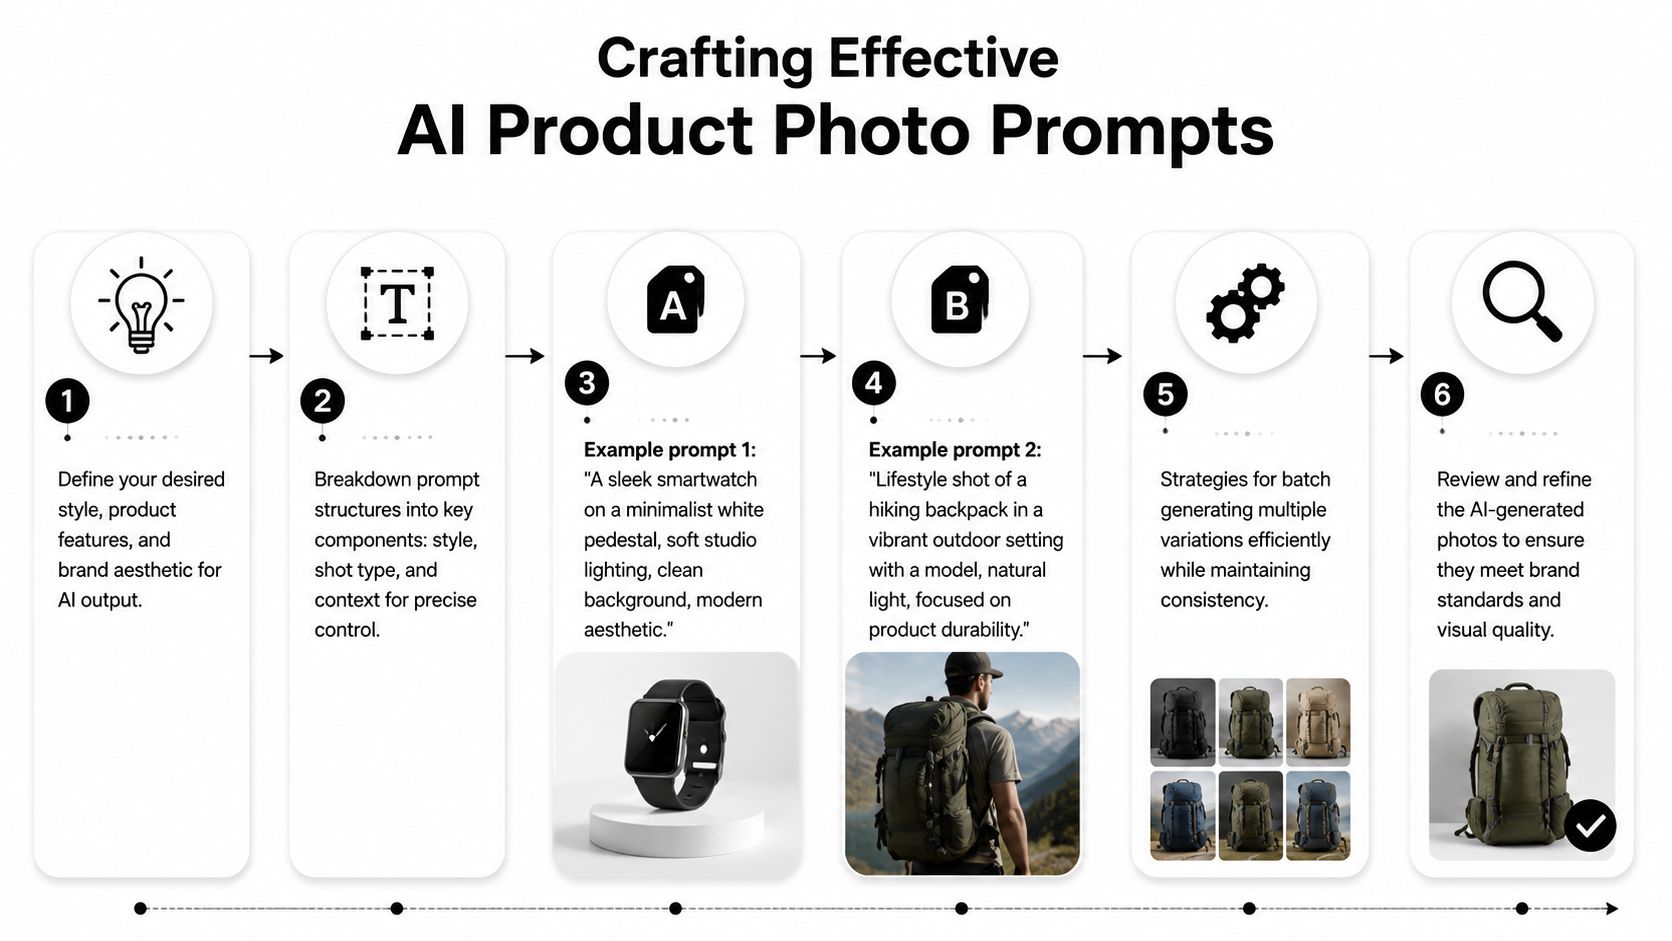
A practical technical workflow is to begin with clean source images, generate 3 to 5 style variants per product, and then run a 50/50 A/B test for at least 2 weeks. One industry guide also recommends measuring conversion rate, add-to-cart rate, bounce rate, and time on page, instead of leaning on clicks alone (workflow guide). That's the right frame because some images attract attention without improving purchase intent.
Batch generation works best when the file system is boring and predictable:
- One folder per SKU: keep inputs, outputs, and approved assets separate.
- Clear naming convention: use product name, angle, and version so edits are traceable.
- Reference pack discipline: store the original photos, prompt text, and final selections together.
- Variant sorting: group images by use case, such as PDP, lifestyle, and ad test.
Keep the prompt library short enough that a new teammate can reuse it without guessing. The more ad hoc the naming, the harder it becomes to scale without breaking consistency.
Post Processing and Quality Assurance
The best AI image still needs a finishing pass. Color correction keeps the product true to life, background cleanup removes distracting artifacts, and cropping standardizes the framing so the gallery doesn't feel stitched together from different sources. That matters because shoppers rarely judge a product photo in isolation, they judge the whole set.
A 2025 blind-test study found that participants identified real versus AI images at about chance level, roughly 50%, which means shoppers couldn't reliably tell the difference in that test (blind-test summary). That doesn't mean every generated image is safe to publish. It means small flaws are the primary risk, because the medium itself isn't what breaks trust. Bad edges, awkward shadows, strange reflections, and mismatched product details do.
The smartest quality check is a human review against the actual product. Compare color accuracy, surface texture, logo placement, stitching, and scale. If the item is white, glossy, or transparent, inspect the boundary carefully, because those are the surfaces where AI tends to look believable until you zoom in.
A clean approval process usually comes down to five questions:
- Does the image show the exact product variant?
- Does the color match the source material closely?
- Are the edges and reflections believable at close inspection?
- Is the crop consistent with the rest of the gallery?
- Would this still feel trustworthy in a Meta ad thumbnail?
If you need a broader workflow for turning approved images into motion or mixed-media assets, this video maker guide with photos and music is a useful adjacent reference. The point is the same either way, quality control comes before distribution, not after the ad is live.
Integrating A/B Testing into Meta Ads Launch Plans
Meta ads are where AI product photos become a testing engine instead of just a faster design shortcut. The easiest mistake is to launch one polished image and hope it works. A better approach is to build distinct ad sets around different angles, then let performance data tell you which objection or visual treatment is most effective.
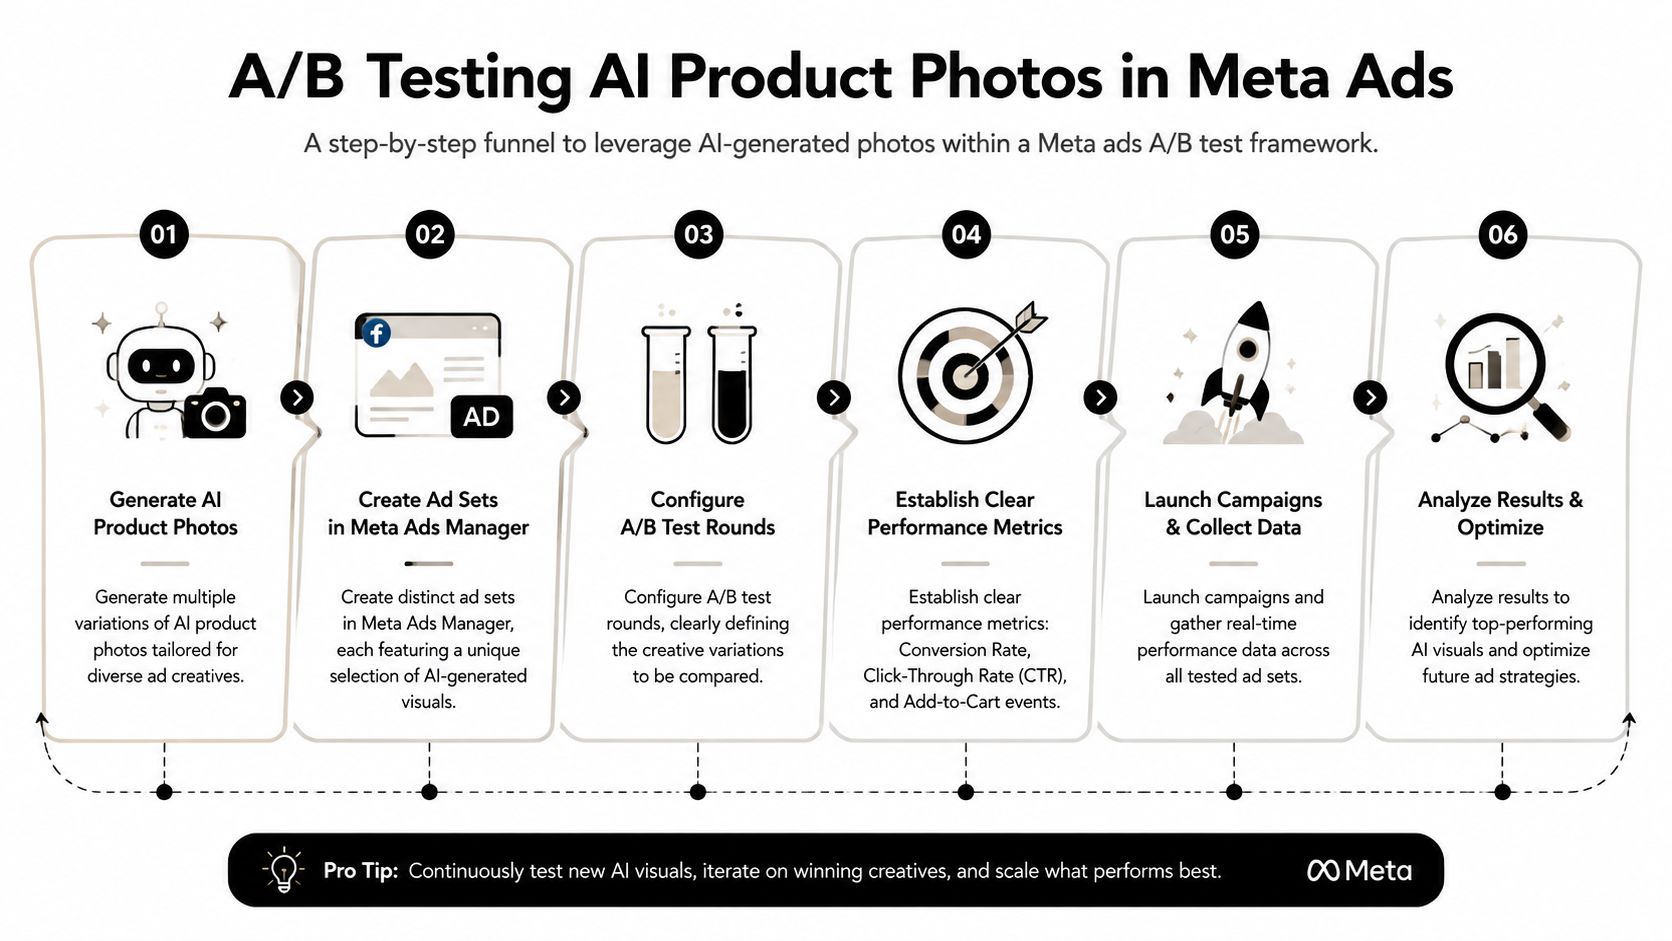
One ecommerce comparison found that AI product photography delivered an average 17.6% lift in conversion rate, 90% faster production, and 99% cost savings versus traditional workflows, with the strongest recommendation being a hybrid model for key items (comparison). That hybrid approach makes sense. Use AI to scale catalog and lifestyle variants, then keep traditional photography where authenticity and texture matter most.
A practical Meta launch plan looks like this:
- Round 1, isolate the hero angle. Test the main product view against a stronger objection-handling angle.
- Round 2, compare lifestyle versus studio framing. See whether context helps or distracts.
- Round 3, test close-up detail. Push texture, stitching, or finish when the product needs proof.
- Round 4, test in-scale imagery. Use it when size uncertainty is a likely barrier.
- Round 5, keep the winning angle but vary the first frame. The opening image often decides whether the ad gets attention.
- Round 6, test copy and image together. Don't assume a good photo can rescue weak messaging.
- Round 7, build the scale set. Use the best-performing visual with your strongest offer and audience segment.
For a clean way to structure these comparisons, a round-robin testing framework helps you avoid mixing too many variables at once. The key metrics stay simple, conversion rate first, then add-to-cart behavior, then the engagement signals that support those outcomes.
Conclusion and Tips for Scaling Your Workflow
AI product photos work best when they're treated like a repeatable production system, not a one-off shortcut. The strongest workflow starts with technically sound source images, plans angles around objections, uses prompts that preserve brand direction, and finishes with quality checks before anything goes into ads. That's how you get speed without turning your catalog into visual noise.
Scaling advantage comes from reuse. Once you know which angle resolves size concerns, which shot works for texture, and which image style wins in Meta ads, you can apply that learning to the next SKU instead of starting over. That's also why AI matters so much for ecommerce creative, because the asset library gets smarter each time you test it.
A few habits keep the process from drifting:
- Review winners quarterly: ad performance changes, and your photo hierarchy should change with it.
- Retire weak angles quickly: if an image doesn't answer a real objection, it doesn't deserve to stay.
- Automate the repetitive edits: cropping, background cleanup, and naming should be as hands-off as possible.
- Keep a hybrid standard: use AI where scale matters most, and reserve traditional shoots for the products that need maximum trust.
If you're launching a new product or rebuilding a weak creative stack, start with one SKU and one objection at a time. Then let the data decide whether the next round should be a new angle, a new background, or a return to a real shoot. A CTA for Social Loop AI.