Blog
Instagram Ads for Beginners: A 2026 Ecommerce Guide
Published July 13, 2026
You've probably done some version of this already. You found a product, built a Shopify or WooCommerce store, posted a few pieces of content, and then opened Meta Ads Manager only to hit a wall. Too many campaign types. Too many settings. Too many people online telling you to build complicated interest stacks, lookalikes, retargeting funnels, and testing matrices before you've spent your first dollar.
That's where most beginners burn money.
Instagram ads for beginners should be simple. Your first job isn't to become a media buyer with a spreadsheet obsession. Your first job is to launch one clean campaign, send qualified traffic to a page that can convert, and learn fast without wrecking your budget.
The good news is that the platform is moving in your favor. The old game of micromanaging every audience detail matters less than it used to. Creative quality, a clean conversion setup, and a disciplined launch process matter more. If you keep those pieces tight, your first campaign has a real chance to work.
Table of Contents
- Groundwork Before You Spend a Dollar
- Choosing the Right Campaign Goal and Budget
- Defining Your Audience with Advantage+
- Creating Ad Creatives That Stop the Scroll
- Tracking Key Metrics and Making Smart Decisions
- Your Ecommerce Ad Launch Playbook
Groundwork Before You Spend a Dollar
A lot of failed campaigns were dead before the ad ever went live. The founder blames targeting, the platform, or the product, but the underlying problem sits underneath everything else. Broken setup, weak tracking, and a product page that gives people no reason to buy.
That's why the first part of Instagram ads for beginners has nothing to do with ad copy. It's account plumbing and conversion readiness. It's like pouring the foundation before building the house.
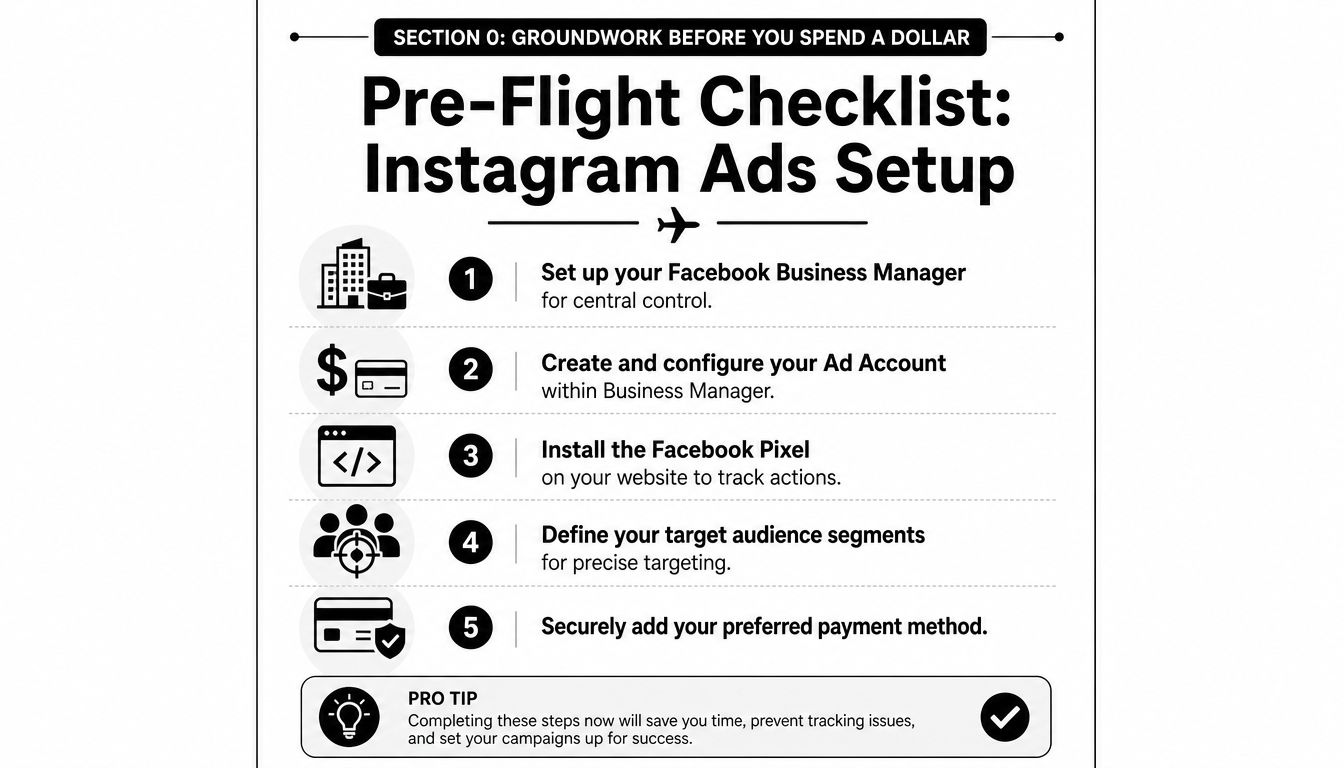
Build the account structure first
At minimum, you need these pieces connected properly:
- Meta Business Manager. You control assets, permissions, and billing here.
- Facebook Page. Even if you plan to run mostly on Instagram, Meta still expects the Facebook side to be connected cleanly.
- Instagram Business Account. Personal profiles create friction. Switch to business and connect it inside Meta.
- Ad Account. Create one inside Business Manager, not from a random personal login path.
- Pixel. Install the Meta Pixel on your store so Meta can track page views, add-to-carts, and purchases.
If that sounds boring, good. Boring setup saves money.
When the Pixel isn't installed correctly, Meta can't learn from real user behavior. When the Instagram account isn't connected correctly, your ad previews break, your social proof gets messy, and troubleshooting gets harder than it needs to be. Beginners don't need more complexity. They need fewer points of failure.
Practical rule: If your tracking is shaky, your campaign data will be shaky. Don't judge an ad from broken signals.
Audit the page before you buy traffic
Here's the bigger issue. A lot of new store owners send paid clicks to product pages that look unfinished. Thin descriptions. Weak images. No trust signals. A buried add-to-cart button. Shipping information that feels vague.
That's why this stat matters. Over 68% of new dropshipping ad campaigns fail not due to poor targeting but because their product page lacks urgency, social proof, or clear CTAs, according to a 2025 Meta advertiser survey of 12,000 small ecommerce businesses (Meta advertiser survey summary via InVideo).
Run this quick audit before you launch:
- Headline clarity. Can a first-time visitor understand the product in a few seconds?
- Visual proof. Do your images or videos show the product in use, not just floating on a white background?
- Offer visibility. Is the value proposition obvious without scrolling?
- CTA strength. Does the page tell visitors exactly what to do next?
- Trust signals. Reviews, FAQs, shipping info, return policy, and contact details should be easy to find.
If your page feels soft, fix that first. A useful reference is this guide to ecommerce landing page best practices, especially if your product page still reads like a supplier listing.
A clean page doesn't guarantee profit. It does stop you from paying for clicks that never had a chance.
Choosing the Right Campaign Goal and Budget
You launch your first campaign, pick Traffic because it feels cheaper, and wake up to a dashboard full of clicks with no sales. I see that mistake constantly. The platform did its job. It found people likely to click, not people likely to buy.
For a first ecommerce campaign in 2026, the safest default is Sales with Meta's AI-driven delivery doing the heavy lifting. New advertisers get in trouble when they optimize for easy metrics. Clicks, views, and likes can make an ad look healthy while the store loses money.
A Business of Fashion marketing article makes the same point clearly. For beginners in dropshipping and DTC, successful campaigns usually use leads or sales objectives because those goals map to revenue.
Choose the goal that matches the action you want
If you sell products online, pick Sales and optimize for the deepest conversion event your tracking can support.
Usually that means Purchase.
If purchase tracking is broken, fix the tracking. If the product page is weak, fix the page. Changing the objective to Traffic does not solve either problem. It just gives Meta a cheaper job.
There is one exception worth knowing. If you have a long buying cycle, such as high-ticket custom products or a quote-based offer, Leads can make sense. That is not the typical first setup for a small ecommerce store.
Keep the account structure simple. One campaign. A small number of ads. A clear product angle. If you have not written down who the product is for and why they would buy now, tighten that up first with a simple buyer persona definition for ecommerce marketing. It will improve your ad message faster than adding extra campaign layers.
Set a budget that gives you signal, not stress
Your first budget has one job. Buy enough data to tell you whether the offer and creative deserve another round.
For a beginner, that usually means a modest daily budget in US dollars, not a scattered setup with five ad sets fighting over pocket change. Start in the $5 to $10 per day range if your budget is tight. That is enough to learn basic lessons without turning one test into an expensive guessing game.
Use these questions to judge whether the spend is teaching you anything useful:
| Question | What you're trying to learn |
|---|---|
| Are the right people stopping to look? | Your hook and creative angle are working |
| Are they clicking through with intent? | The ad promise matches what shoppers want |
| Are visits turning into carts or purchases? | Your page, offer, and tracking are in good shape |
Small budgets break when beginners overbuild. The common pattern is one campaign, three ad sets, five interests, two placements, and not enough spend for any version to learn. Meta's system in 2026 works better when you give it fewer constraints and stronger creative inputs.
Three budget rules that save beginners money
- Keep the budget steady for a few days. Constant edits reset learning and muddy the signal.
- Do not split a tiny budget across multiple audiences. One broad setup usually beats several starved ad sets.
- Judge results at the ad level first. Weak creative is a more common problem than weak targeting on a new account.
A stable test beats a clever structure.
If the campaign spends and nothing happens, do not rush into advanced settings. Check the basics. Is the ad clear? Is the offer strong? Does the landing page make buying feel easy? Beginners waste a lot of money trying pro tactics before they have one ad that earns attention and one product page that converts.
Defining Your Audience with Advantage+
Old-school ad advice taught beginners to build detailed audience stacks. You'd layer interests, narrow by behavior, add exclusions, and spend hours trying to outsmart the system. That approach made people feel in control. It also made a lot of first campaigns fragile.
The platform has moved. Beginner strategy should move with it.
Why narrow interest stacks often fail beginners
When you use tight interest targeting on a new store, you create two problems at once. First, you shrink the pool Meta can learn from. Second, you distract yourself from the main issue, which is usually the creative.
That's why I push new advertisers toward a broader setup. If the product is clear and the ad is strong, Meta's system usually does a better job finding likely buyers than a beginner manually stacking hobby pages and niche interests.
There's support for that shift. Meta's own data shows campaigns using broad targeting + AI-driven creative optimization achieve 22% higher ROAS than those relying on interest stacks for first-time ecommerce advertisers (Funnel guide on Instagram ad best practices).
That doesn't mean targeting is irrelevant. It means creative usually deserves your attention first.
A simple audience setup that keeps you out of trouble
For most first campaigns, use a broad structure:
- Location. Pick the countries you can ship to reliably.
- Age range. Keep this wide unless your product clearly excludes certain groups.
- Gender. Leave it broad unless the product is unmistakably gender-specific.
- Advantage+ audience features. Turn them on and let Meta expand where it finds likely buyers.
That's enough.
If you're tempted to add ten interests because it feels smarter, stop and ask a harder question. Does your ad clearly communicate who the product is for and why they should care? If not, no targeting trick will save it.
A useful exercise is building a customer snapshot before you write the ad. This guide on buyer persona definition is a good way to clarify pains, objections, and buying motivation without turning your audience setup into a science project.
Broad targeting works best when the message is specific. Let the audience be broad. Make the angle sharp.
One more practical note. Advantage+ is not magic. It won't rescue a lazy offer, weak page, or bland creative. What it does do is remove a common beginner mistake. Over-targeting too early.
Creating Ad Creatives That Stop the Scroll
A first-time founder usually loses money here, not in campaign setup.
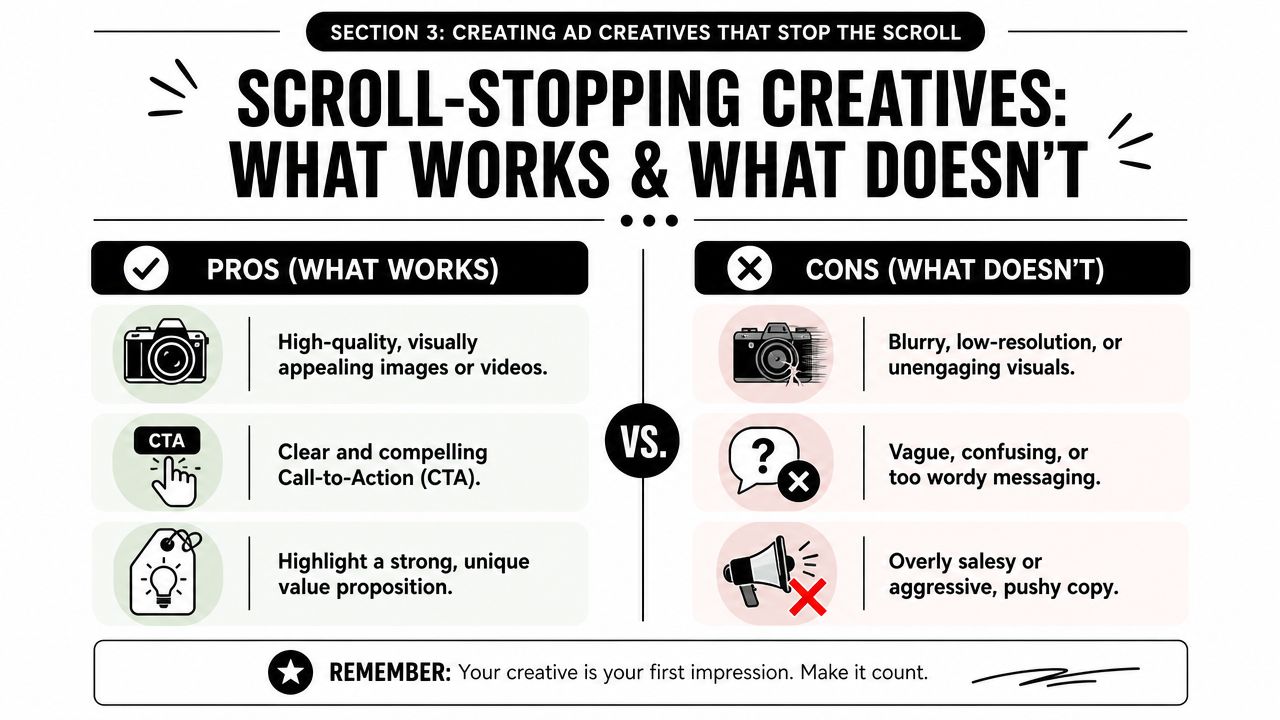
The 2026 beginner mistake is trusting Meta's AI targeting to carry weak creative. Advantage+ can help find likely buyers, but it still needs clear inputs. If the ad is bland, the system learns slowly, clicks get expensive, and you end up “testing” a product with bad creative instead of testing real demand.
Build around one angle, not one ad
A beginner-friendly account structure is simple. A beginner-friendly creative process should be simple too.
Do not try to make one polished ad that says everything. Pick one reason a buyer should care, then make a few versions of that idea. That gives Meta better material to test, and it gives you cleaner feedback on what message is working.
For a typical ecommerce product, start with angles like these:
- Problem to solution. Open with the irritation, then show the product removing it.
- UGC-style demo. Show the product in real use, with a natural explanation of why someone bought it.
- Social proof. Show what buyers like, repeat, or recommend.
- Identity. Show who this product fits and what kind of routine or self-image it supports.
Keep the angle fixed. Change the wrapper. Test different first shots, hooks, captions, and text overlays.
That matters more now because Meta is doing more of the audience work for you. Your job is to feed the system a few distinct, clear messages, not twenty small creative tweaks that all feel the same.
A factual example helps here. Social Loop AI can turn a product URL into launch angles, ad concepts, and creative batches. For a new founder, that can shorten the gap between “I know my product” and “I have three usable ad ideas.”
A beginner-friendly creative example
Take a simple product. A portable blender bottle for people who want shakes at work, in the car, or after the gym.
Weak version: a clean product photo, plain background, and a caption that says “Portable Blender Bottle. Shop now.”
That ad is not broken. It is just easy to ignore.
Stronger problem to solution version:
- First shot: someone shaking a lumpy protein drink and looking annoyed
- Text overlay: “Still drinking clumpy shakes?”
- Cut to the bottle blending smoothly in a car cup holder
- Text overlay: “Blend anywhere in seconds”
- Final shot: close-up of the bottle in use with one clear CTA
The improvement is simple. The ad starts with a familiar frustration, then resolves it fast. The viewer does not have to work out why the product matters.
Here's a useful walkthrough on how short-form ad creatives come together in practice:
A second angle for the same product could use a more personal voice:
“I bought this because I was tired of carrying a full-size blender bottle everywhere. Now I just keep this in my bag.”
That sounds like Instagram. It sounds like a buyer talking, not a brand presenting features.
If you want help shaping that style, this guide on how to make UGC-style product ads is a practical reference.
Keep the format native to Instagram
Production quality matters less than clarity and pace.
For a first campaign, keep the creative native to the feed or story placement. Use vertical video. Get to the point in the first second or two. Put the product in use early. Add text overlays because many people watch without sound. Ask for one action, not three.
A few format rules cover most of what beginners need:
| Element | What to do |
|---|---|
| Video length | Keep it short. In most cases, 15 seconds or less is enough. |
| Aspect ratio | Use vertical creative that fills mobile screens well. |
| Visual style | Make it look like normal Instagram content, not a display banner. |
| CTA | Ask for one clear action only. |
Refresh creative on a steady rhythm, not a panicked one. If one angle is getting clicks, keep it running and introduce a new variation every few days. That gives you fresh tests without constantly restarting the learning process.
The ad does not need expensive lighting or agency editing. It needs a clear hook, a believable demonstration, and a reason to care fast. For small budgets, that is the most impactful work in the whole campaign.
Tracking Key Metrics and Making Smart Decisions
You launch on Monday, check results by lunch, and start wondering if you should change the audience, rewrite the ad, or shut the whole thing off.
That reflex burns budget.
With beginner Instagram ads in 2026, Meta does more of the targeting work through Advantage+. Your job is to read the signals correctly and fix the right part of the system. For a small ecommerce account, that usually means watching a few numbers, giving the campaign enough room to gather signal, and changing one variable at a time.
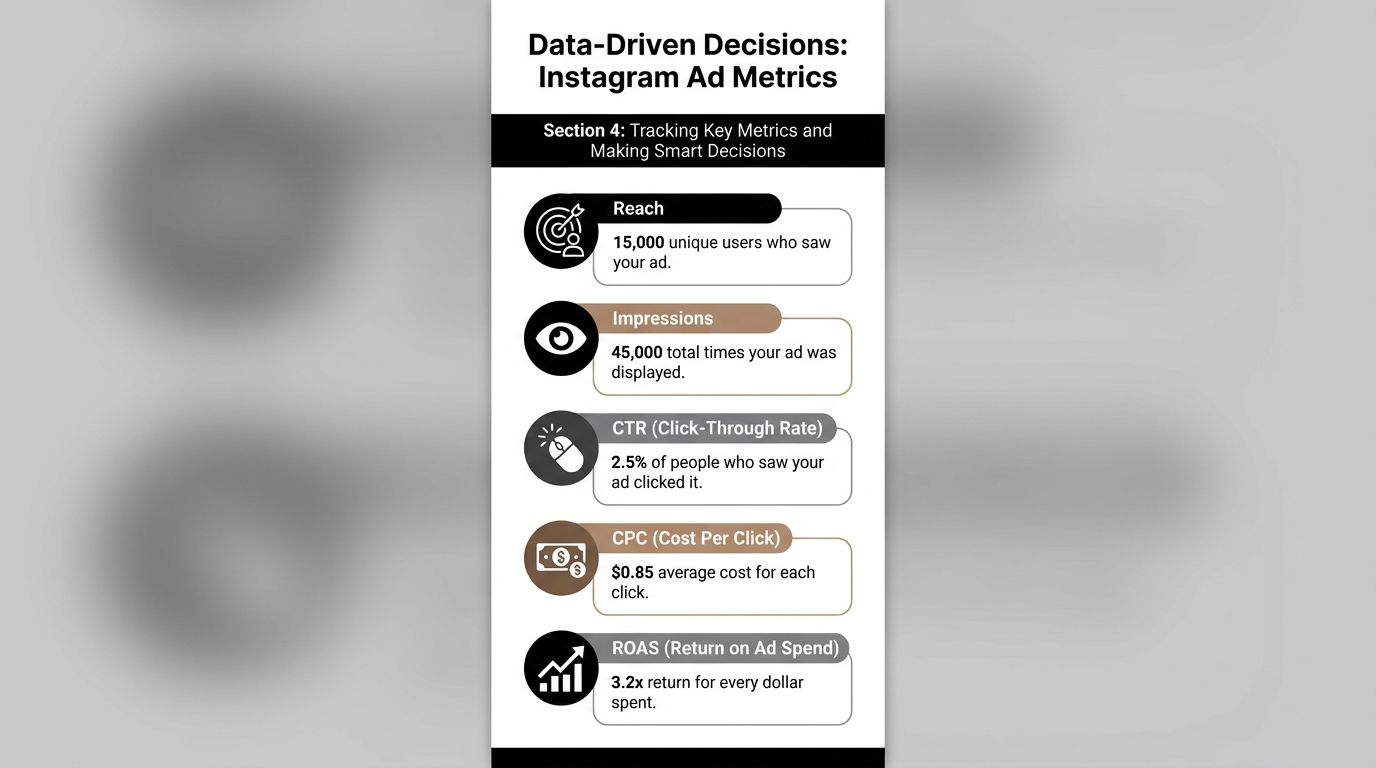
Watch a short list of metrics
For a first campaign, track three things first:
- CTR
- CPC
- Purchases or purchase value relative to spend
Start there because each metric points to a different problem.
CTR tells you whether the ad earns attention and interest. CPC tells you how expensive that attention is. Purchases tell you whether the click turned into revenue. If you read those three in order, you can usually tell whether the issue sits in the creative, the offer, or the product page.
Use this interpretation table as your first filter:
| If you see this | It usually means | First fix to consider |
|---|---|---|
| Low CTR | The hook, angle, or first frame is weak | Replace the opening line, first visual, or core message |
| High CPC with weak CTR | The ad is not compelling enough to earn cheap clicks | Test a stronger problem, clearer benefit, or sharper offer |
| Clicks but no purchases | The page or offer is losing trust after the click | Check page clarity, product proof, shipping, returns, and CTA |
| Some purchases but weak margins | Sales are coming in, but the economics are off | Review pricing, bundles, discounts, and shipping costs |
What to do when the numbers look wrong
Do not judge too early.
A new campaign needs enough impressions and clicks to show a pattern. If you edit every few hours, you reset the learning process and learn almost nothing. I see beginners do this constantly, especially after Meta starts spending fast on day one.
A cleaner way to operate is simple:
- Weak clicks usually point to the ad
- Good clicks but no sales usually point to the page or offer
- Sales without profit usually point to pricing or cost structure
That keeps you from making expensive wrong turns. If your ad gets traffic and nobody buys, building a new audience is usually wasted motion. Advantage+ is already doing broad discovery. The better move is to inspect the product page, the price, the shipping terms, or the level of trust your page creates.
One more trade-off matters here. Early spend can be useful if it helps you find a winning angle, but only if you turn that spend into a clear decision. If one creative gets solid click-through and another barely gets attention, cut the weak one and make two more versions of the stronger angle. If all creatives get clicks and none convert, stop making ad edits and work on the store.
Beginners usually waste money in one of two ways. They ignore the dashboard completely, or they react to every wobble. The better habit is boring and profitable. Check the same small set of numbers, wait for enough signal, and make one deliberate change at a time.
Your Ecommerce Ad Launch Playbook
By this point, the pattern should be clear. Beginners don't need a giant ad account. They need a clean loop. Prepare the page. Launch with the right objective. Keep targeting broad. Test angles, not random assets. Read the numbers without flinching.
That process is repeatable. Use it every time you launch a new product.
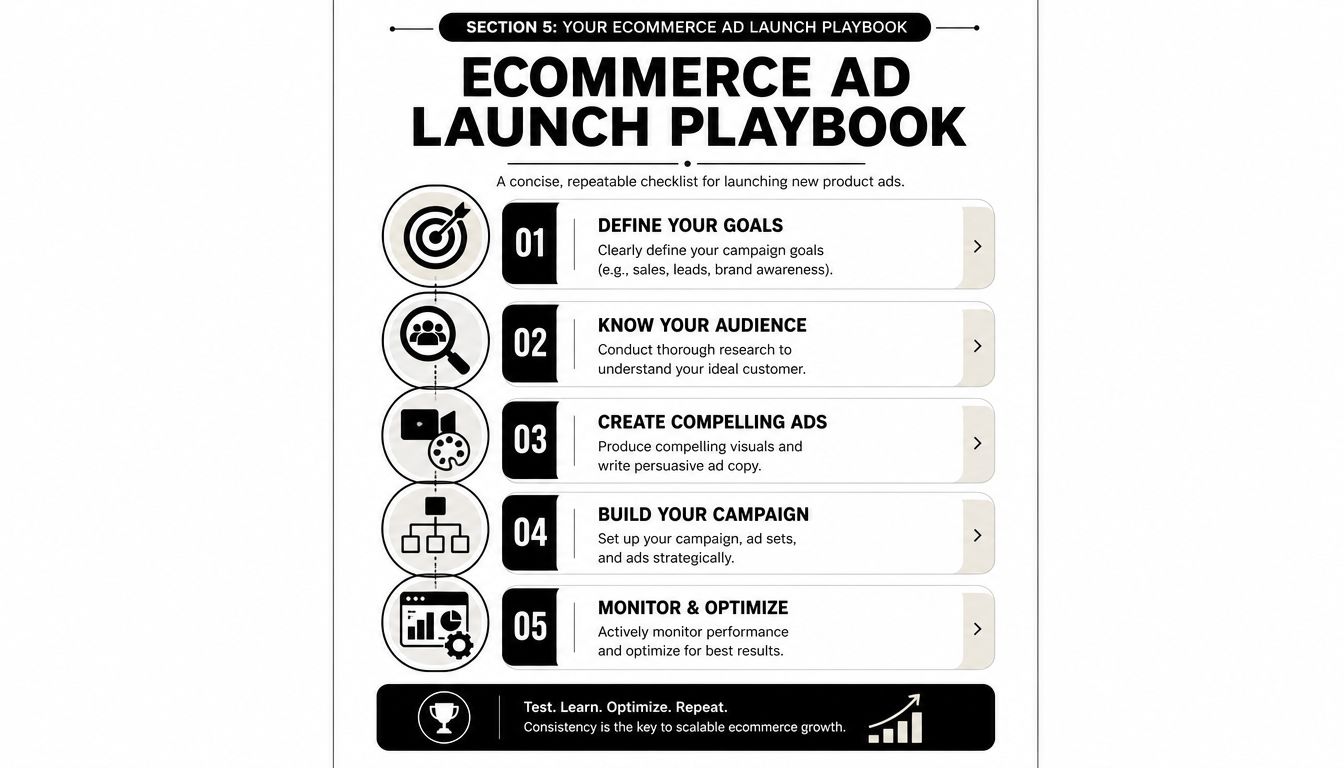
The repeatable launch sequence
Use this as your default operating order:
-
Prepare the store
Make sure the page is clear, trustworthy, and easy to buy from. -
Set up one clean campaign
Use the Sales objective and keep the structure simple. -
Use broad audience settings
Let Advantage+ do the heavy lifting while your creative does the filtering. -
Test multiple angles
Don't launch one ad and hope. Launch several variations built around distinct buying motivations. -
Read results with discipline
Change the creative when clicks are weak. Change the page when clicks don't turn into buying behavior.
That's the playbook. No advanced funnel required. No dense retargeting tree required. No fake sophistication required.
Common beginner mistakes that waste money
A short blacklist matters just as much as a checklist.
- Launching before the page is ready. Paid traffic exposes weak stores fast.
- Choosing traffic because it feels cheaper. Cheap clicks can still be low-quality clicks.
- Over-targeting too early. Narrow audiences reduce learning and hide creative problems.
- Using polished but lifeless ads. Clean design means nothing if the hook is dull.
- Changing too many variables at once. You can't learn from chaos.
- Writing copy like a product listing. Instagram rewards relevance and clarity, not sterile descriptions.
- Ignoring mobile behavior. Your ad and your product page both need to read clearly on a phone.
If you stick to the basics, Instagram ads for beginners become much less intimidating. You're not trying to master everything. You're building a process that protects budget, creates signal, and gives you a realistic shot at finding a winning angle.
If you want help turning a product page into a launch-ready ad plan, Social Loop AI is built for first-time ecommerce founders. It audits the page, maps buyer angles, and generates brand-aware Meta ad creatives so you can move from guesswork to a structured first test without hiring an agency.